
Home-brewed hombucha with fresh strawberries; fizzy lavender kombucha
I started a new kitchen project a few months ago, and I’ve been waiting until I was confident with the process to share it with you. I’ve entered the world of homemade kombucha!
Making kombucha is a fun, fairly simple, money-saving process and, once you get comfortable with it, you can make kombucha that tastes better than anything you find in a health food store. Kombucha is a naturally effervescent (slightly carbonated) fermented tea containing probiotics (good bacteria found in yogurt).
My mom’s friend had been making kombucha, so she gave me a SCOBY (pronounced ‘sko-bee’, Symbiotic Colony of Bacteria and Yeast) to start my own batch. I started really small by brewing one liter at a time. Here are the basics to making your own kombucha:
Ingredients
SCOBY kombucha starter (see FAQs below)
1/4 cup of mature, unflavored, kombucha liquid (get this from the same place as your SCOBY)
1 liter water (filtered/spring water is best)
3-4 black tea bags (preferably organic, but any unflavored black tea will work)
1/4 cup sugar (I use unbleached cane sugar, read about sugar options here)
1 clear glass container (you’ll want one that holds at least 2 liters of liquid)
1 clear glass container the the same size as above that can be sealed, or multiple smaller containers that can be sealed
1 clean cotton dish towel
First Fermentation
- Wash the glass container in the dishwasher or with very hot water.
- In a pot on the stove, bring 1 liter water to a boil. Particularly if you’re using tap water, let the water boil for at least 5 minutes. Add 1/4 cup of sugar and stir until dissolved.
- Remove from heat and add 3-4 black tea bags, cover, and let brew for about 10 minutes. Remove tea bags and let sit until room temperature.
- Wash your hands (not with antibacteria soap!) before touching the SCOBY. Any natural soap is fine, a little apple cider vinegar or already-made kombucha works, too.
- Pour the cooled tea and the kombucha starter liquid into the glass container. Carefully (with clean hands), place the SCOBY on top of the liquid. It’s best if it floats or is somewhere near the top.
- Cover the container with the cotton cloth and put in a warm place where it won’t be disturbed for about a week. I keep mine in the corner of the kitchen covered with the towel so it’s dark. If it’s cold the fermentation process will take a bit more time, but as long as it’s above 65 F it should be fine.
- Wait it out. I like to carefully check on my kombucha every few days to see that nothing funky (i.e. mold) is growing and that the SCOBY is still on top of the liquid. If you see mold at any point, you’ll need to throw everything out and start over with a new SCOBY. I haven’t run into this problem though, and as long as you keep the environment clean, you should be fine.
- After about a week, taste the kombucha to see if it’s a good sweetness level. I usually do this by removing the SCOBY with clean hands, giving the tea a tiny stir with a non-metal spoon, and then taking out a little spoonful to taste. The longer you wait, the tea will contain less sugar and taste for more vinegar-like. If it’s too sweet, you can re-cover and let it ferment longer (I’ve done up to 3 weeks in colder months). You can drink the kombucha at this point, but I recommend doing a quick second fermentation.
Second Fermentation
- When the kombucha in step 8 above is ready, clean the clear glass containers that can be sealed. You can use any size for this, but I prefer to use single-serve, 16 oz bottles.
- This is where you can get creative with flavoring! Start with something simple like a few pieces of fresh ginger (and see below for more ideas). Put the ginger or whichever fruit/herb/flavoring you’re using in the bottle. This is also where you can choose to filter the kombucha and get rid of any brown stringy material that has developed by using a fine mesh strainer. This doesn’t bother me so I just leave it in. Pour the kombucha into the bottle. Seal the bottle. Repeat until all kombucha has a second fermentation home.
- Place the sealed bottle(s) in a warm dark place for 1-3 days. I put the second fermentation inside a kitchen cabinet. You also might want to label the bottle with the date.
- After 1-3 days (less if you don’t want much carbonation, more if you like it fizzy), put into the fridge, which will stop the fermentation process. If there are small pieces like lavender buds in your batch, you’ll want to strain the kombucha before drinking.
- Enjoy!
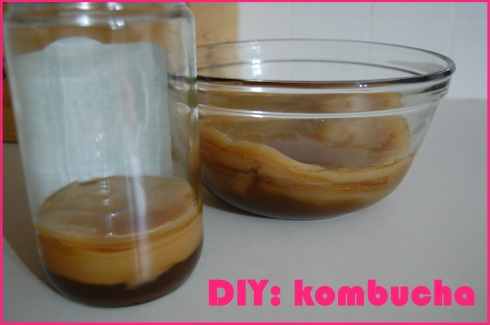
My small and big SCOBYs in kombucha starter liquid
Frequently Asked Questions about Kombucha:
What are the kombucha tea health benefits?
There are a variety of articles and studies debating and testing whether kombucha is good for you. I’m not a nutritionist, so please evaluate whether you personally feel comfortable drinking kombucha, but here’s my take: if it’s brewed safely in a clean environment and I’m not drinking gallons/day (I drink about 32 oz/week), I’m happy to enjoy it as beverage, not a medicine. I’ve noticed increased energy, a great clean feeling in my stomach after I drink it (which I can only attribute to the probiotics – good bacteria found in yogurt), and I like how it tastes. Some claim it detoxifies the body or improves your immune system – eating a plant-based, nutrient-rich diet will do that too – I’m more about balance and moderation.
Does it contain alcohol?
Yes, a very small amount, as it’s a fermented beverage. Some kombucha companies will write on the packaging not to consume if the buyer is pregnant or nursing. I’ve never noticed alcohol-related effects from drinking it, although I also don’t drink more than 16 oz in one day.
Isn’t buying kombucha easier than making it?
Maybe at first, but once you begin your DIY mini kombucha factory, reaching into the fridge is easier than going to the store. I do have a few favorite kombucha makers, though. Katalyst Kombucha, based in Greenfield, MA, has a great product and I love grabbing some on-tap Ginger Devotion from the Harvard Farmer’s Market. They’re local, organic, and know how to make some delicious booch. GT’s is also good if you’re looking for a pre-packaged option from a place like Harvest or Whole Foods – Lavender and Trilogy (raspberries, lemon, and ginger) are my favorite from GT Kombucha. Brewing it myself, however, I can experiment with different flavor combinations and brewing intensities, plus it’s way cheaper than the $4/bottle I sometimes spend at the market.
So how many flavors can you make?
Endless possibilities! I’ve seen people use everything from the more typical fresh ginger/lemon/herbal tea options to fruit, jam, spices, and juice. Adding a tea bag to the second fermentation is an easy way to add flavor: you can make kombucha with green tea, ginger tea, chai tea… I recently made black tea kombucha and then added a yerba mate tea bag. Delicious! Another favorite right now is a dried lavender with fresh ginger combination. Here are some ideas from Cultures for Health if you need inspiration.
Don’t I need one of those mushroom-looking things?
Yes, you do! You can purchase a kombucha tea starter kit online, but in the spirit of keeping food local and sharing with neighbors, why not find a SCOBY (also called the mother) and kombucha starter close to home? They travel very easily in a sealed container with some unflavored kombucha. Health food stores often have community boards where people might post free SCOBYs, or ask around to see who knows someone.
How do I get started?
Just like baking bread or organizing your closet, everyone has a different technique for making kombucha. Before I started making it and my SCOBY was sitting on my kitchen counter, I panicked that I would kill it and researched what to do by looking at YouTube videos for about two hours and reading great sites like this one on TheKitchn. Once I learned about a few different perspectives and saw that, while the SCOBY needs to be kept free from contamination, the living gelatinous disk is actually a lot more resilient than I initially thought.
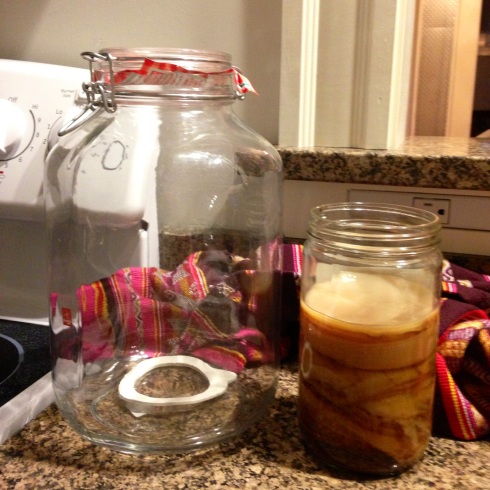
Check out this huge Italian Fido jar. I can’t wait to use it!
So that’s the beginning of my kombucha story. I look forward to learning more and hope you’ll come along with me for the ride.
Have you or someone you know tried to make kombucha? I’d love to hear about it!


